Support / The map & imagery / Your own drone photo

Your own drone photo under the map

Fly over your yard, upload the photo, and it replaces the satellite view on your map, in the map editor and on the wall. Yardstick puts it close to the right spot for you; a minute of lining it up with your robot gets it exact.

Where it lives: Upload it in Settings → Map imagery Line it up on the map with Align photo
The short version Upload the photo in Settings → Map imagery. Open the map, turn off the layers you do not need, and zoom in on your robot sitting on its dock. Press Align photo, hold the mouse button down on the photo and drag the dock in the photo onto the robot. Then use Size and Turn until the far side of the yard lines up too, and press Save.

Taking the photo

Any drone will do. A few things make the lining up much easier.

Point the camera straight down
Tilt the camera all the way down before you take the picture. A photo taken at an angle stretches the far side, and it will never line up everywhere at once. Yardstick tells you when a photo was taken at an angle.
Get the whole yard in one frame
Higher shows more of the property, and the further apart the things you line up, the better the result. Stay within the rules for where you fly; in the United States that is generally 400 feet above the ground.
Include the dock
Your robot's dock is the best thing to line up first, because Yardstick knows exactly where it is. If trees hide it from above, a corner of the house works almost as well.
Upload the original
Use the file straight off the drone or its memory card, not a screenshot, an edited copy or one sent through a messaging app. The original carries the drone's own record of where it was, and Yardstick uses that to place the photo for you.

Upload it

Open Settings → Map imagery and press Upload a photo under Your own drone photo. JPEG, PNG and WebP all work. The photo is kept exactly as you took it, at full resolution: Yardstick never shrinks or re-saves it.
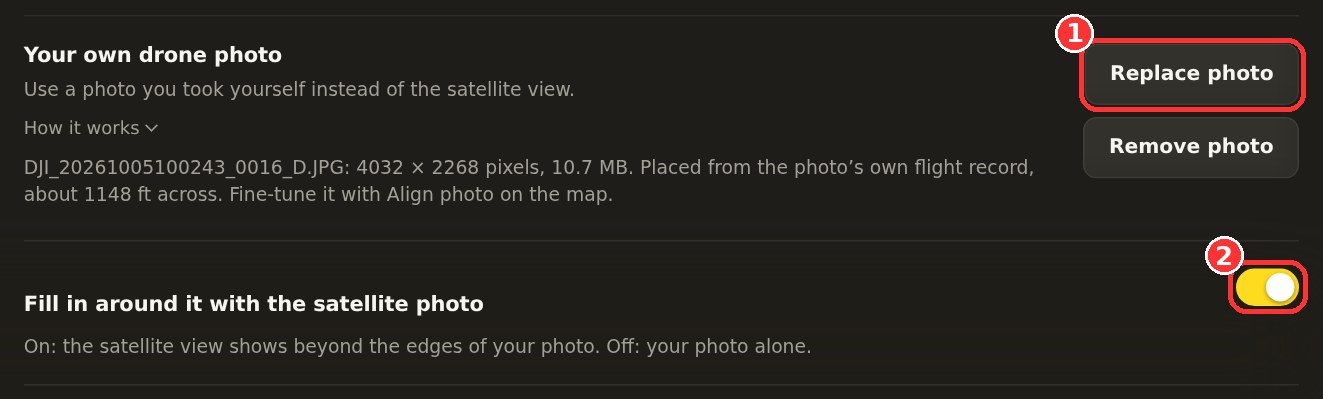
The Your own drone photo card in Settings: the photo's name, size and how far across it is, with Replace photo and Remove photo buttons, and the switch to fill in around it with the satellite photo.
1 Upload, or replace, your photo. Once one is in, the card shows its size and how it was placed. 2 Fill in around it with the satellite photo: on by default. This switch is saved with the card's Save button.
Yardstick places it for you, as close as it can Most drones, DJI included, record inside the photo where they were, how high they flew and which way they faced. When that is there, Yardstick reads it and puts the photo in place on its own, to get you started. Expect it to be close but not exact: the height is measured from where the drone took off, and a drone's compass is often a few degrees out, so plan on a minute of lining it up. A photo without that record starts in the middle of your yard, roughly the size of it, for you to place by hand.

Line it up

The method that works best: start at the dock, where Yardstick knows to the inch where your robot is, then bring the rest of the yard into line.

The buttons under the map: Yard map, Aerial, Align photo, Whole property, Coverage, Path and the panels, with the zoom minus, plus and Fit buttons below.
1 Align photo turns on lining up. 2 Zoom out, zoom in and Fit, which shows the whole map again. The mouse wheel zooms too, around wherever the pointer is.
  1. Clear the view

    Under the map, turn off Yard map, Coverage, Path and Planned route. Leave Aerial on. Now the map shows your photo and one green dot: your robot, where it really is.

  2. Zoom in on the dock

    With the robot parked on its dock, put the pointer over the green dot and roll the mouse wheel to zoom in until the dock fills a good part of the map.

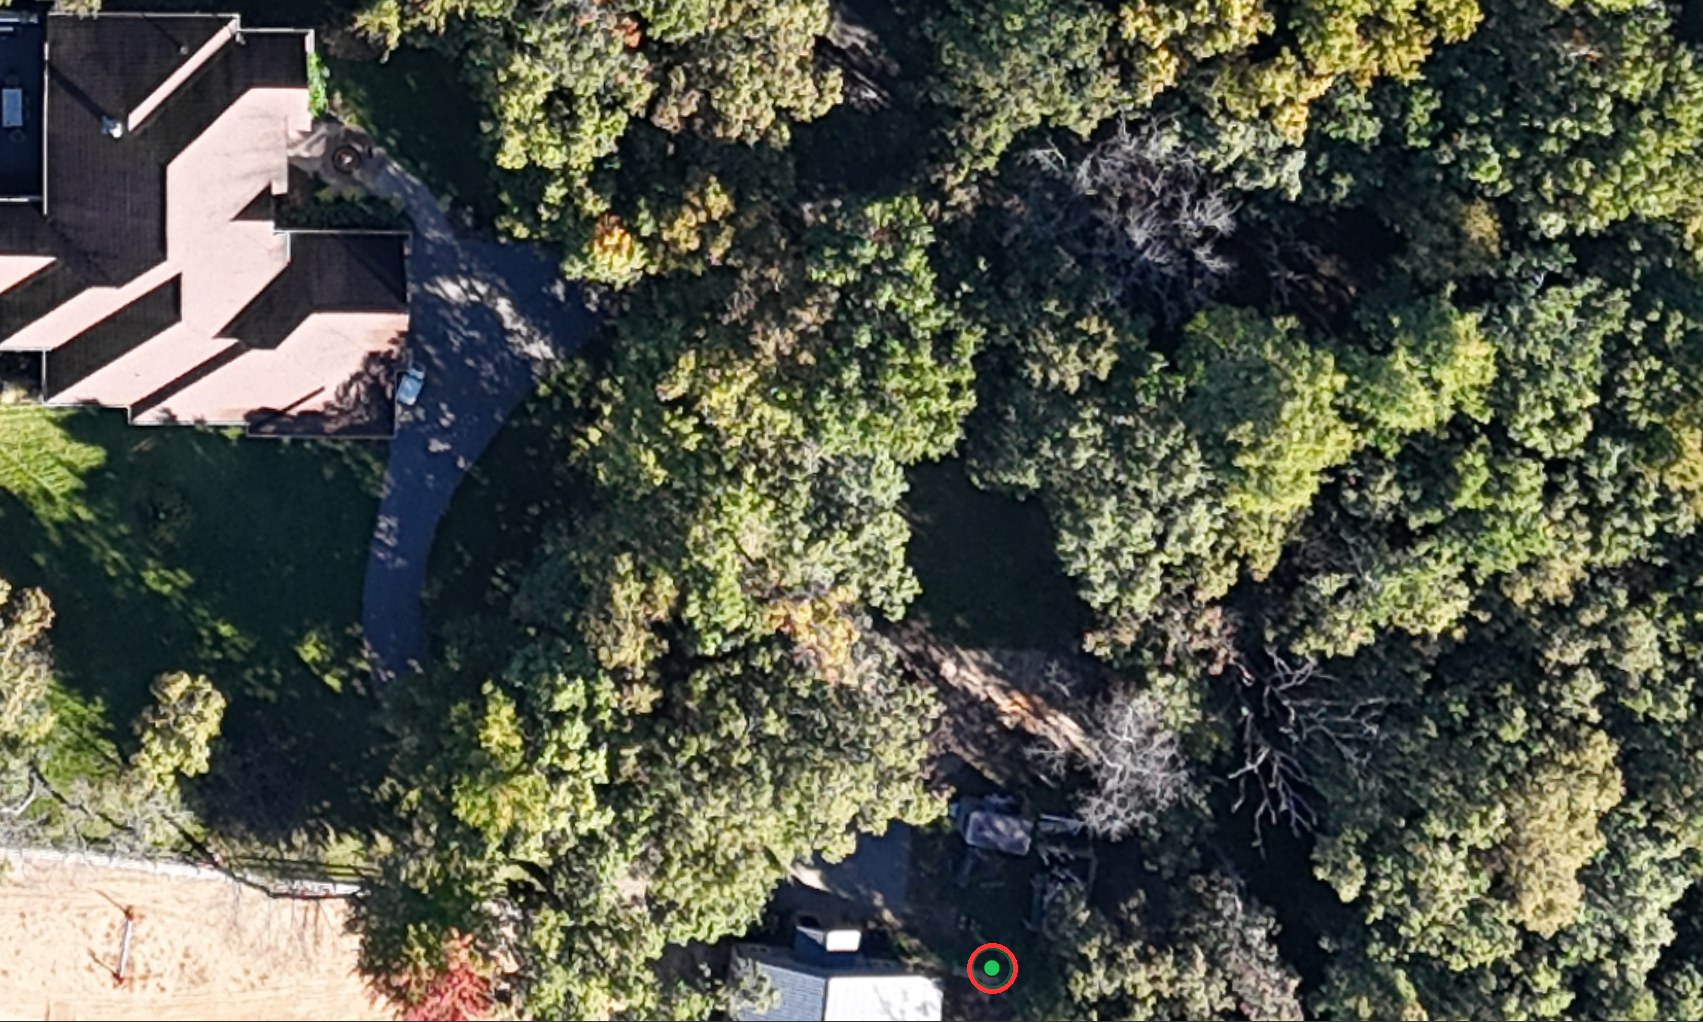
Zoomed in close on the drone photo, with every layer off except the photo and the green dot of the robot sitting at its dock.
Layers off, zoomed in. The green dot is your robot on its dock, placed by its own GPS to within an inch or two. The photo needs to agree with it.
  1. Press Align photo, and drag the dock onto the dot

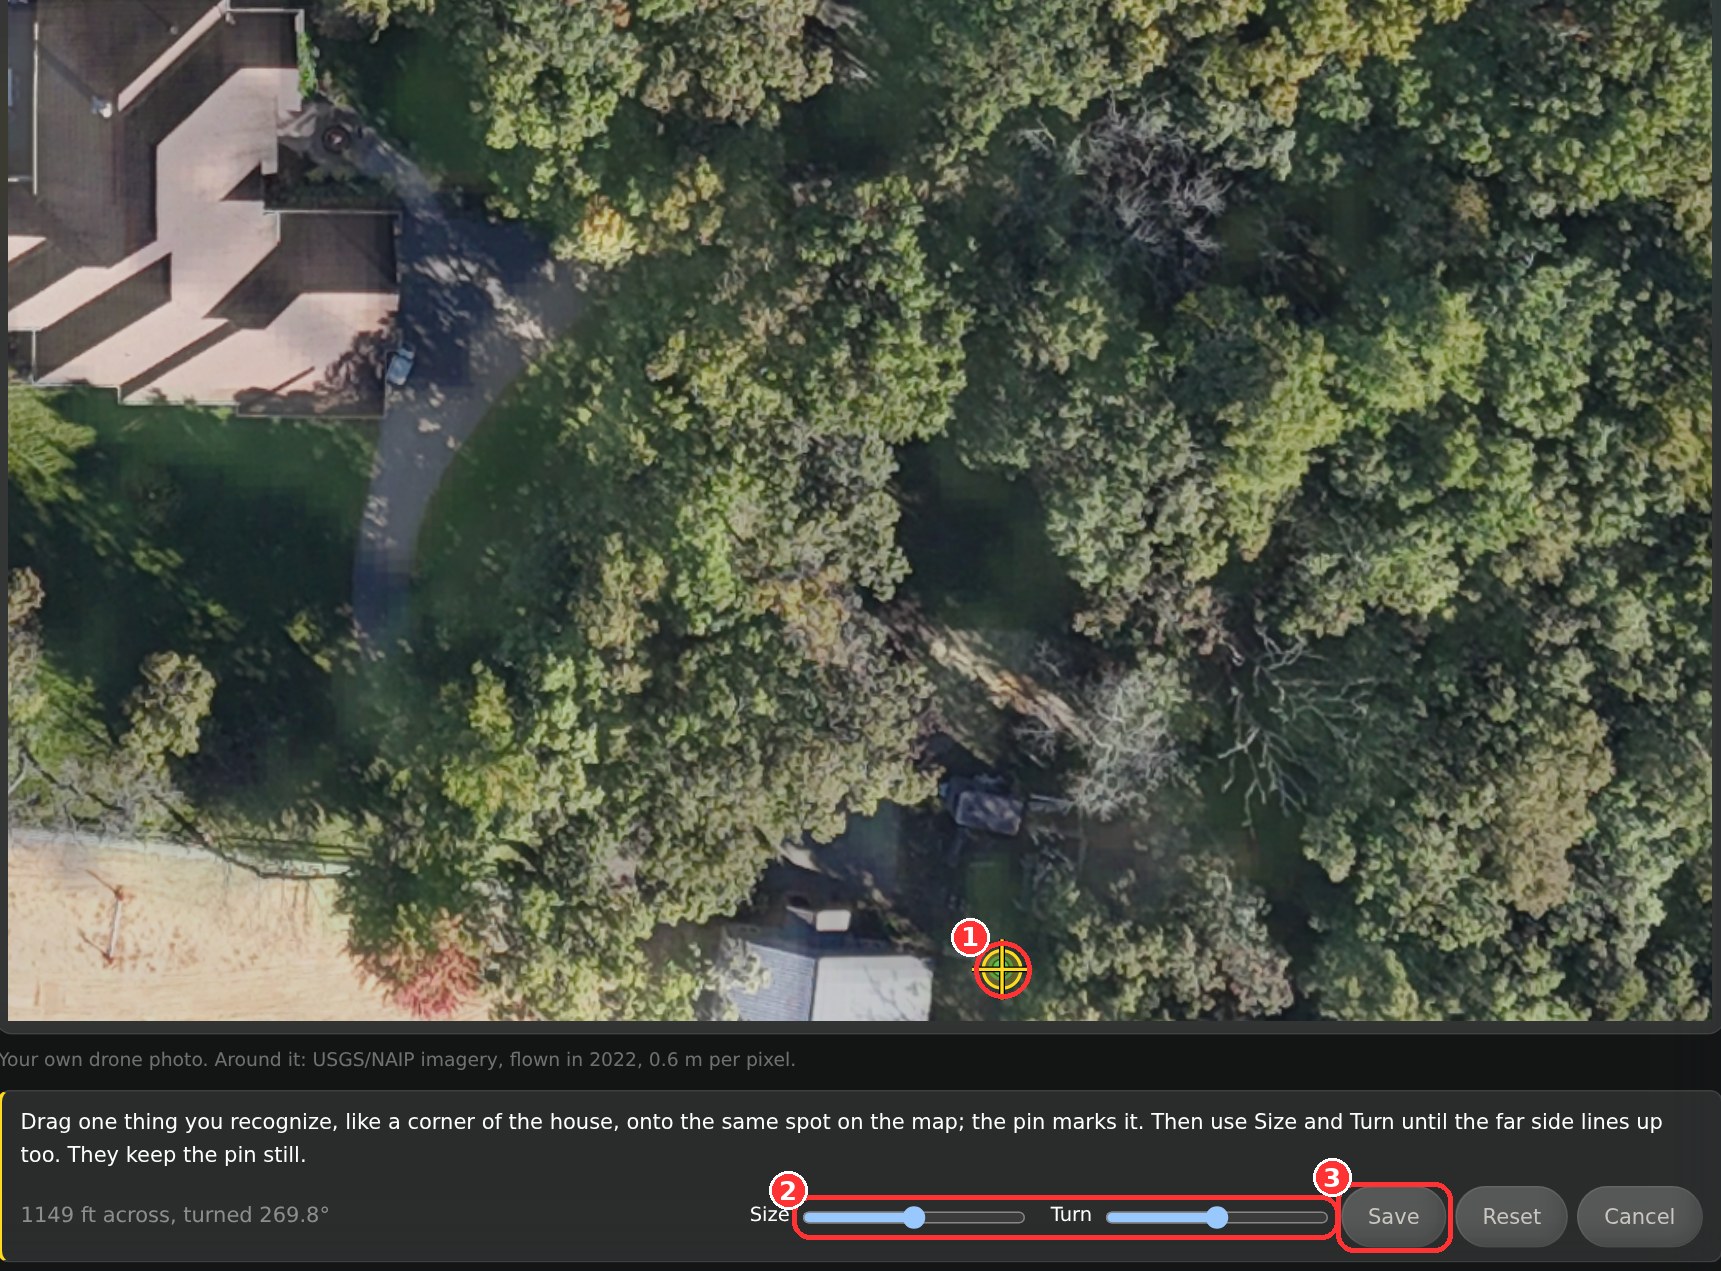
    The photo turns see-through. Hold the mouse button down anywhere on the photo and drag: the whole photo moves with your hand. Bring the dock in the photo under the green dot and let go. A yellow crosshair, the pin, appears where you let go.

  2. Bring the far side in line with Size and Turn

    Press Fit or zoom out until you can see the far end of the yard: the end of the driveway, a fence corner, a shed. Slide Size until it reaches the right distance, and Turn until it points the right way. Both work around the pin, so the dock stays exactly where you put it. Each slider springs back to the middle when you let go, so you can keep going in either direction.

  3. Save, then turn your layers back on

    Press Save. The map editor and the wall use the same placement straight away. Turn your layers back on to see your yard over the new photo.

Align photo turned on: the photo see-through, a yellow crosshair pin on the dock, and the bar below with Size and Turn sliders and Save, Reset and Cancel buttons.
1 The pin, where you let go after dragging. Size and Turn keep it still. You can drag the pin on its own to another spot. 2 Size and Turn. 3 Save. Reset goes back to the last saved position and Cancel throws the changes away.

Fine-tuning with the keyboard

For the last few inches, while Align photo is on. Hold Shift with any of them for steps about ten times bigger.

Arrow keys
Slide the photo about ten inches at a time, and the pin with it.
[ and ]
Turn it a quarter of a degree, around the pin.
− and =
Make it a fraction of a percent smaller or larger, around the pin.

Tips

One end lines up, the other is short or long
That is Size. Leave the pin on the end that is right and slide Size until the other end reaches.
The far end is off to one side
That is Turn. Again, leave the pin where it is right.
Line up things that are far apart
The dock and the end of the driveway, or two opposite corners of the property. Two things close together can both look right while the far side is well off.
Use the robot's own tracks
With Path on, the robot's recorded track shows the real edges of your driveway and lawn. Edges in the photo should sit on it.
Close everywhere, not perfect everywhere
On a hilly yard a single flat photo can be exact in one place and a foot or two out in another. Aim for it to be right where your robot works.

Where it shows, and taking it away

Your photo replaces the satellite view on the map, in the map editor and on the wall display, all from the one placement you saved. With Fill in around it on, the satellite photo still shows beyond its edges; turn that off to see your photo alone.

To go back to the satellite view, press Remove photo in Settings → Map imagery. The photo is deleted from your computer. Replace photo swaps in a new one and places it fresh.

I do not see the Align photo button

It appears once there is a photo under the map. With more than one robot, pick one robot at the top of the map first: the all-robots view has no single position to line up against.

It says the photo does not say where it was taken

The file has lost the drone's record, usually because it was edited, sent through a messaging app or screenshotted. It still works: it starts in the middle of your yard and you drag, size and turn it into place. Uploading the original from the drone saves you most of that.

It says it is not a photo Yardstick can use

Use a JPEG, PNG or WebP. Raw files (DNG) and videos are not supported.

Still not lining up? Open a support ticket and send your diagnostics from Settings → Support. Tell us roughly how high you flew and what drone you used.

Related

Yardstick is an independent tool for Yarbo robots. Not affiliated with or endorsed by Yarbo Inc. · © 2026 Yardstick Technologies LLC.