Where it lives
Open the map editor, click a work area to select it, then press Settings in the toolbar.
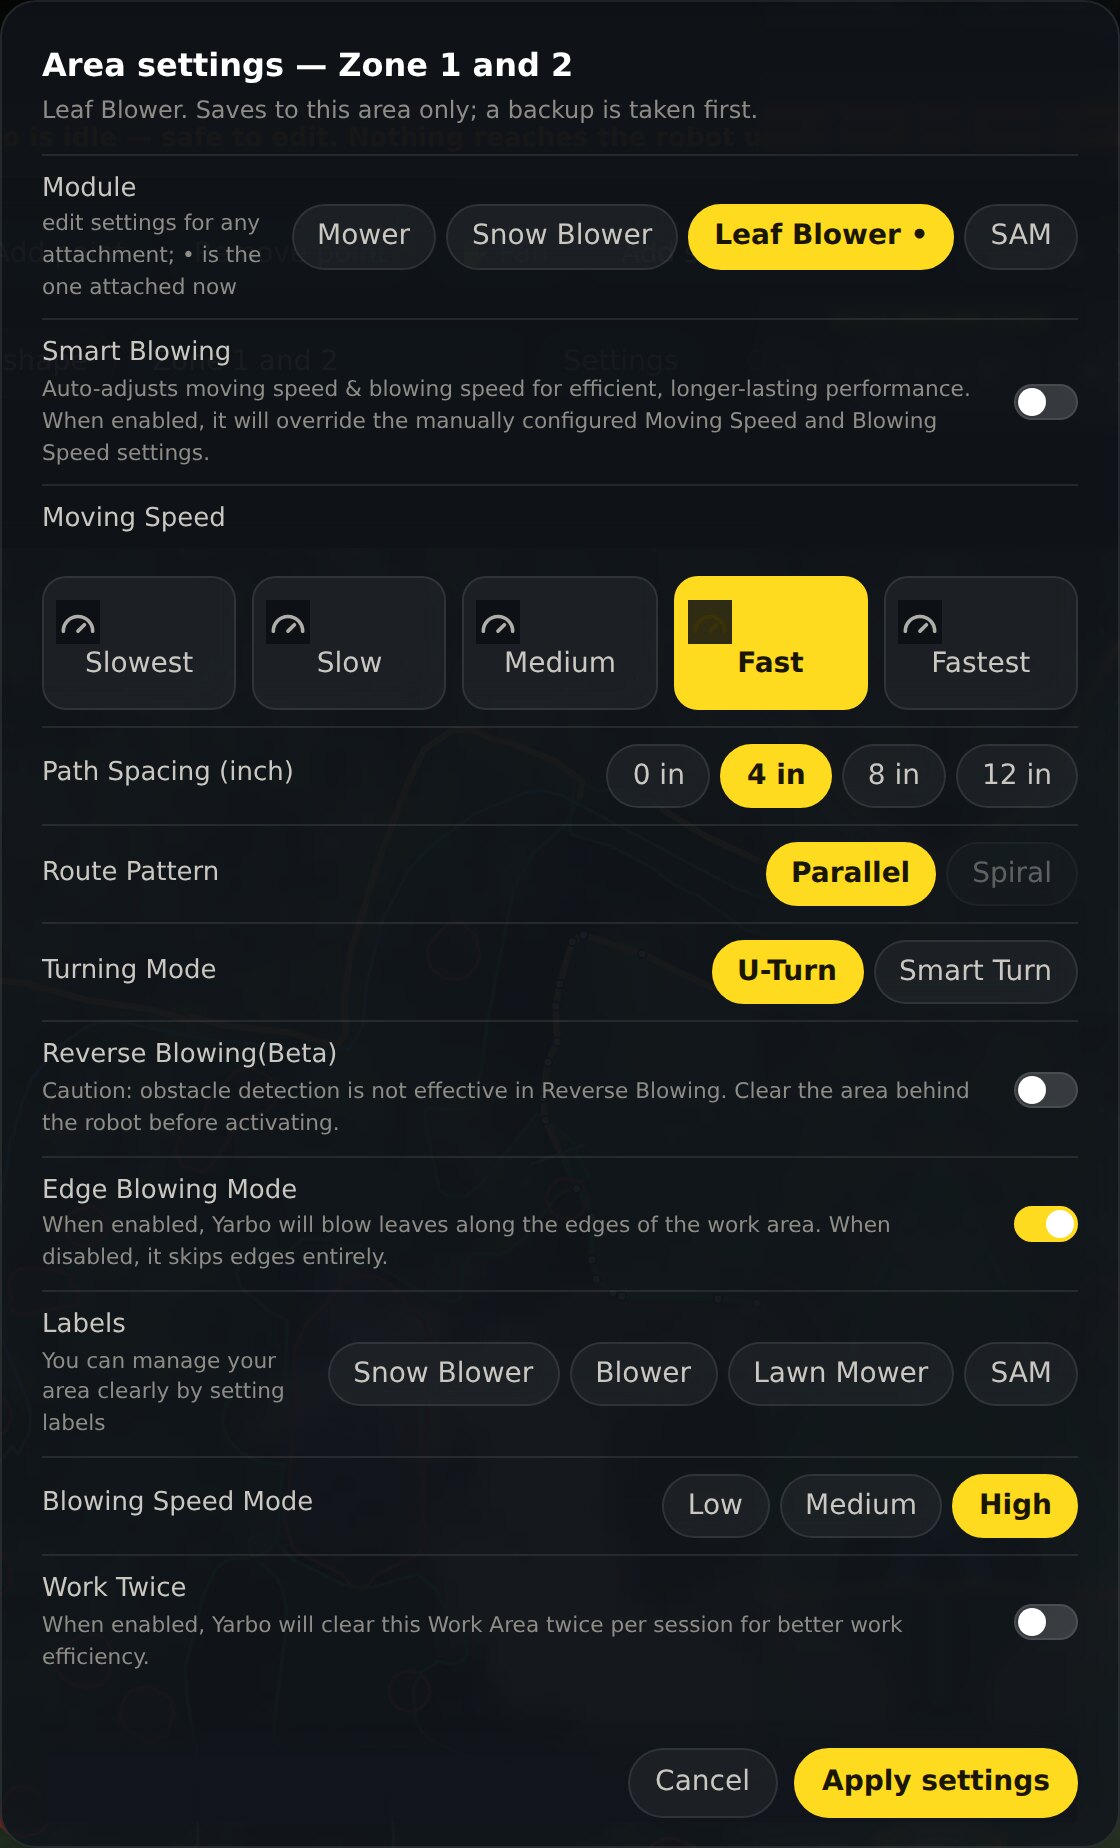
Pick the attachment first
Each area holds a separate set of settings for the mower, the snow blower, the leaf blower and SAM. The dot marks the one attached right now. Change the module and you are editing a different set of numbers, so check the row at the top before you start.
What you can set
Speed and spacing
How fast it moves through the area and how far apart the passes are.
Route pattern and turning
Parallel or spiral, U-turn or smart turn.
Edge behavior
Whether it works the edges of the area at all, and how many times round.
Attachment specifics
Blowing speed and reverse blowing for the leaf blower, blade height and speed for the mower, and so on. The dialog shows only what applies to the module you picked.
Work twice
Cover the area twice in one session.
These travel with a map backup
Area settings are not stored in the map file you can see, but they do come back when you restore a map backup. Restore a snapshot from before a change and the settings return with it.